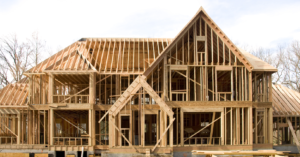
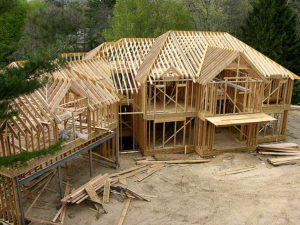
Myrtle Beach Wood Framing Contractor
The first and probably most critical phase of framing is preparation. After Top Line Construction gets the green light to start a frame, we spend a few days with the plans. This allows us to familiarize ourselves with the project. The most important thing we do in this preliminary period is envision building the roof. Roofs call the shots when it comes to wall heights, and rarely do the plans call out the correct wall heights. In simple roof structures this isn’t a problem, but when roofs become complex, as in most custom homes, it’s imperative to understand how their structure affects the rest of our framing.
Layout and Plating


What a carpenter does next sets the tone for the rest of the project. A square layout will make smooth work of the frame, but a sloppy one will lead to nothing but grief, and you’ll end up fighting with the frame all the way to the roof. In order to get a square and true layout, we use string lines to set up a large square representing two perpendicular walls on the slab or subfloor. We pick the longest outside wall and make it the control wall. Then we square off of that.
Anchor bolts, hardware, and plumbing pipes can interfere with the strings, so when we set up the lines representing exterior walls, we measure in from the outside of the wall-twice the width of that wall. That’s where we set the sting lines (7 inches in for a 3-1/2-inch wall). When we are ready to snap a chalk line, we measure back the width of the wall, mark where the inside of the plate will go, and snap the lines.
We measure along the control wall to a point where we want to make a 90-degree angle, usually where it intersects with another exterior wall. If there isn’t a decent-sized exterior wall to work with, we’ll pick a spot along the wall that will allow for the placement of a nice long 90-degree baseline. We pick a spot to terminate the second line (I try to have a minimum of 30 feet on each leg), and enter the measurements of each leg into the calculator as “rise” and “run.” Then, by pushing the “diagonal” key, we get the distance needed between the two corners to create a perfect square. You need a couple of good 100-foot tapes for pulling these long diagonals.
When we are ready to snap lines, we use red chalk mixed with about one-third Spanish red cement dye. This gives me a line that even lasts through rainstorms. I save other chalk colors for any subsequent changes in layout-which I usually mark with blue. And I’ve had good luck preserving lines through all kinds of weather by spraying lacquer or low-cost hair spray on them. To snap lines, we use a sharp awl to hold the hook on wood subfloors, or a weighted can with a hook for slabs. For convenience we have a layout tool box that carries four 100-foot tapes, six large-geared chalklines, (two that serve as dry lines without chalk, two for the main color, and two for changes) and plenty of chalk.
One thing that can slow you down is laying out and drilling the plates for anchor bolts. A tool we use that helps speed things along is an angled piece of metal called a bolt marker. With the plate placed to the inside of the chalk line marking the exterior wall, you align the bolt marker with each bolt and then tap it with a hammer to mark on the plate where the bolt holes need to be drilled.
For drilling we use an 18-inch-long auger bit driven by a 1/2-inch Milwaukee drill running off a 100-foot cord. The long cord can get tangled without disconnecting the plug each time, and the long bit allows you to drill without having to bend over. But with the advent of new powerful 18-volt and larger batteries, a cordless drill may be the way to go.
We are really picky about the tightness of our cuts when cutting plates. An 1/8-inch gap between plates is unacceptable. We want the walls to plumb up right on the money. Good tight plating ensures that. Once we’ve cut and placed all the wall plates, it’s time to layout for studs, windows, and doorways. For accurate and rapid marking of studs 16 and 24 inches on center, I use an aluminum layout stick. On corners and channels I use an off-the-shelf aluminum channel marker, but you can make either of these tools on the job out of a 1×4.
Wall Framing
While the layout and plating is being done, we have a carpenter cut the headers, window assemblies, posts, and beams. Then, when it’s time to assemble walls, that’s all you will be doing. Even though we have to do some framing with a hammer, most of the walls we put together will be done with a pneumatic framing nailer, because it increases production and minimizes the strain on your arms, elbows, and wrists.
We bang together and store as many walls at one time as the floor space will allow. That way we can raise a lot of walls in a short time; the fewer wall-raising sessions, the better. When a wall has a doorway, we always run a near full-depth saw cut flush alongside each door trimmer or jack. This pre-cut makes it real easy to cut out the doorway plate later on.
On tall walls that exceed the safe lifting capacity of the crew, we stock the wall as usual, and nail in the window and door openings, but we don’t nail up most of the studs. The crew can then easily stand this skeleton wall. We’d rather stand and toenail a bunch of studs in from ladders than risk an injury. On the other hand, when a wall is really huge-such as a giant 2×6 rake wall with multiple window arrangements, we will build it complete, sheathe it, and then call in a crane or lift for help.
Plumb and Line
When all the walls are standing and temporarily braced, it’s time for the “plumb and line” stage. If you snapped good square lines and cut tight plates, the walls should plumb up easily. Sloppy plating on out-of-square lines will force you to rack the frame and make in-place sawcuts to get the walls plumb.
To tighten down the anchor-bolt nuts on our exterior walls, we save time by using an electric impact wrench. This is another great opportunity to use cordless tools. Using a ratchet and socket or a crescent wrench takes too much time. We do use a socket and wrench to deal with hold-downs, though, and in this case a full set of large sockets is a must.
To fasten the interior walls on a slab we use a powder-actuated fastener, commonly called a stud gun, and use a plastic strip of ten shots and a pin with attached washer. This style of fastener can shoot a hundred pins in no time. Once all the walls are fastened down, it’s time to pull out the level and adjust them so their plumb. In custom home framing, where it’s typical to find various wall heights, we use an expandable level.
Once the walls have been plumbed and the braces nailed off, we line up the tops of the walls by eye to see if they’re straight. I set up a ladder at a corner and sight along the top plate, looking for bows and kinks. With a string line in place someone can then push or pull where the wall needs straightening, and then nail the brace to hold the wall straight.
Hold-Downs and Shear
Most large custom homes we build are engineered, which results in lots of hold-down hardware and plenty of shear panels. We attack this phase right after we plumb and straighten the walls. We install the hold-down brackets at this point rather than earlier because no matter how careful you are, there will inevitably be some framing in the way. We don’t want to put any extra wood in the way before we install these things. When all the hold-downs are installed, we nail on the shear panels.
In Conclusion
We do not want any flaws in our projects and these steps assure that our customers will always be 100% satisfied. After all of the precautionary measures that Top Line Construction takes, there are a few more critical steps that we take in order to assure perfection in each job. Because of these certainties Top Line Construction, LLC is truly an outstanding company and the best choice for quality service and customer satisfaction.
CONTACT US
Top Line Construction INC
P.O.Box 30554
Myrtle Beach, SC 29588
E-mail: contact@toplinesc.com

